 |
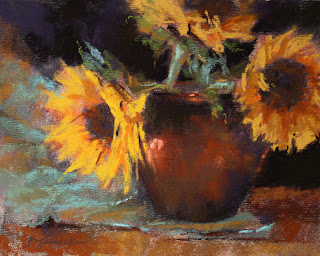
| Sunflower Trio, pastel, 8x10 |
Although I'm primarily a landscape painter, I enjoy painting still life, too. A few of my pastel students sometimes accompany me on weekly plein air outings, but most of my students prefer working from photos. So every once in awhile I hold a still life class in order to get everyone out from behind the photos and work from life.
But there are challenges with doing this in a class setting. If you're limited to the space available in the studio, everyone in the class will need to huddle around one still life setup. And no one person (except the instructor who set it up) has control over the placement and lighting of the still life objects. Basically, you
get what you get from where your easel is set up. That's the case in my studio where I hold classes. In other art centers where I've taught, I've had the use of larger studios and the ability to provide each student with their own space to set up their own still life objects, but they still needed to share lighting.
I personally feel that it wasn't until I started composing my own still life set ups that I really could do this type of work to my satisfaction. Maybe it's the control freak in me, but there's nothing like having total control over the objects selected, surface, background, arrangement, and the all important LIGHTING.
So for this week's class, I held a "demo only" class and went over what to consider when getting a still life set up...encouraging my students to put these ideas to work at home, where they can take advantage of that "total control" thing.
Before we got to the topic of lighting, we discussed still life composition and decisions that need to be made up front which will affect the composition. One such decision is at what level in relation to the viewer's eye to place the arrangement (overhead view? eye level?). As a landscape artist, an equivalent decision I usually make up front before painting a landscape is regarding a high horizon vs. a low horizon. Shadows and reflections (and composing these elements) as an integral part of the composition were also discussed.
I tend to approach still life in a similar manner to plein air painting. I use a viewfinder to help me determine where to crop. I also make use of the camera on my phone to snap a quick shot and quickly review various ways to crop. For plein air painting, I use both of these tools. With using the camera snap shots, I can quickly flip through the various compositions and see which ones work better than others.
On to lighting...I've noticed that many accomplished still life artists tend to arrange their subject matter within a controlled lighting environment; either some type of enclosure or area in their studio in which they can block out or direct controlled lighting.
Below is my very crude attempt at creating a still life environment. If I were to begin specializing more in still life, I have to say that I'd certainly want to improve upon this. But the objective here was to more carefully control and direct the light source and enhance/darken the shadow areas. Without an enclosed area, the area in which the objects are placed receive too much light from various areas of the room. Another option is to darken the entire room, but in my studio during the day, too much light comes in through the windows. After I got going with my demo, I wished I extended the dark cloth on all three sides in order to darken the shadow areas some more. Like any other genre, it takes practice in order to master the subtleties of setting up a still life. The best still life artists are able to create a sense of drama with the ability to get focused lighting exactly where they want it. And many still life artists take as much (or more) time composing their arrangement as they do painting it.

But for the purposes of today's class, the goal was to simply inspire my students with a few ideas to work from life at home. Hopefully they'll all do their homework!
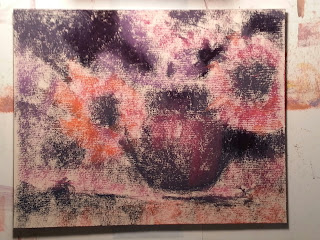 |
| A preliminary block-in for Sunflower Trio. |


